ROG, Realtek and Windows 11, oh my!

If you’ve used a home-built PC with Realtek HD audio built-in on Windows in the last decade,, you’ve likely experienced frustration or even an inability to get sound working on your machine. Windows 11 is no different and is arguably broken out of the box on some systems. My particular experience was based on a machine upgraded from Win10, but even fully removing the drivers, deleting the device and rebooting produced the same outcome, so take that as you will.

I didn’t expect audio to work after the upgrade given Microsoft’s history with Realtek drivers in the past, (and I wasn’t wrong) but I also didn’t expect it to be as difficult to get working. Firstly with Windows 11, Microsoft introduced a feature called “vulnerable driver protection” which attempts to save users from themselves. Sadly it works poorly and in this case even breaks the Realtek drivers sourced directly from Microsoft’s own servers.

My goal with this was simple, 1) get the realtek drivers working at a basic level, 2) try to get full functionality of my built-in audio ports equal to what I had in Windows 10. I had a strong suspicion that one of the drivers the above feature was blocking, AsIO.sys was part of the issue. That driver is responsible for processing audio streams and is provided by the Realtek/Asus ROG driver package. The steps I took to get audio working were as follows:

  1. Disable vulnerable driver protection
  2. Delete audio devices from Device Manager
  3. Remove the installed drivers
  4. Install the Asus ROG audio driver package downloaded from their site

This got sound working, but only basic stereo sound from the rear outputs. The driver package also installs something called the “Realtek Audio Console.” This program allows you to enable some of the other features like front panel i/o. In my case I had to disable automatic detection and manually set the headphone out and mic in ports under “Device Advanced Settings.” This also exposed the full list of inputs and outputs in case I ever need to use them in the future.

Once working, this still took some tweaking to get the settings similar to what I had in Windows 10. One thing that’s worse is the available volume range for the headphones. The amplification is set extremely low requiring a much higher volume setting than in the prior version of Windows, but at least it works.

Archiving old floppy disks with the Greaseweasel

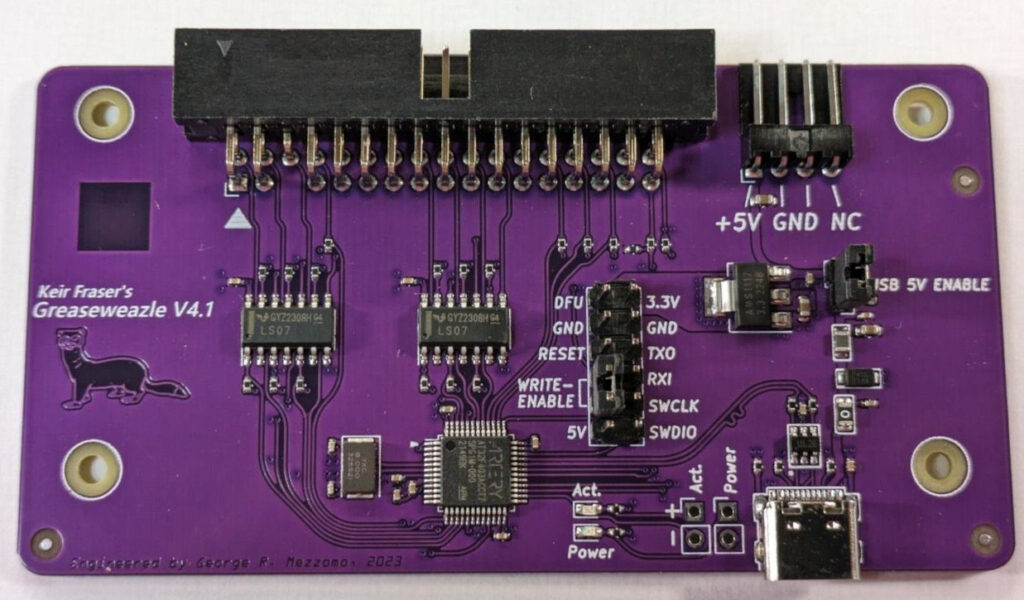
My Christmas wish list was very short this year, and a bit nerdy. (well ok… really nerdy) One of the things I had on my list was an oddly named open source bit of hardware called a Greaseweazel. This tiny little circuit board is a powerful tool that makes it possible

Greaseweazel circuit board
Greaseweazel v4.1

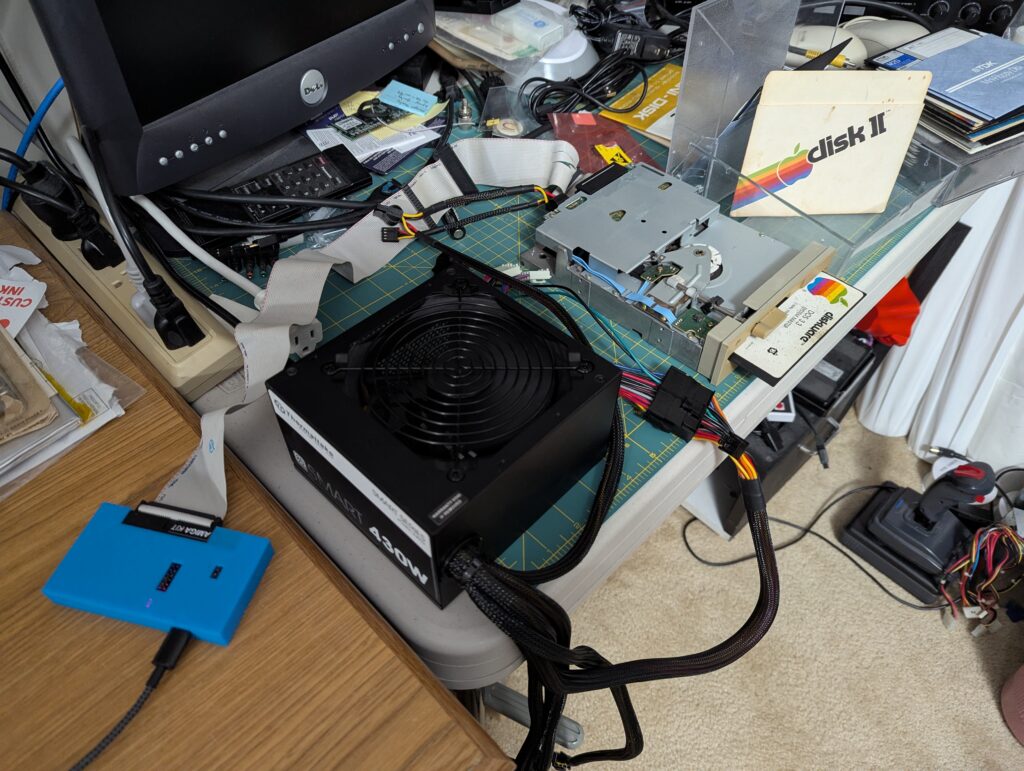
…to archive just about any type of floppy disk on a PC. You can build it yourself as a DiY kit, or order one pre-assembled. (I’d recommend ordering it pre-built unless you have a hot air rework station and are good with SMD soldering) When complete, the board connects to your computer via USB-C and to a floppy drive via a standard PC floppy ribbon cable. (you’ll also need a standalone power brick with a molex output, or a spare PC power supply for the floppy drive itself)

What makes the Greaseweazel so powerful is that it doesn’t really care about the format of the disk as it just reads the raw magnetic flux transitions straight from the read heads on the drive. (basically the raw analog signals recorded on the magnetic media itself) This can make it possible to extract data from disks that would otherwise be completely unusable. It also gives you the potential to make copies of damaged disks and potentially repair them at a later time digitally.

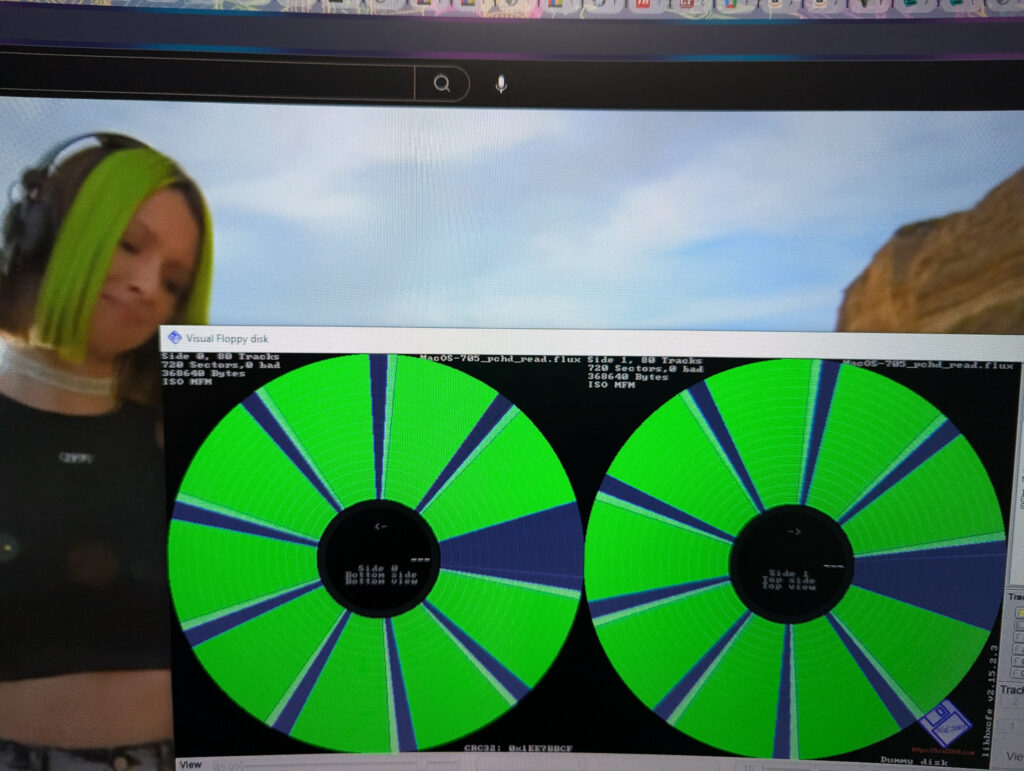
In addition to the native Greaseweazle software, there are several other open source toolkits that support the hardware and make working with certain types of disks easier. I’ve mostly been using FluxEngine and a windows tool called FluxMyFluffyFloppy which gives the native software a graphical interface. Another useful tool is HxC Floppy Emulator. (if you’ve ever seen tech youtubers working with graphical representations of floppy images, you’ve probably seen this)

My initial setup with a 1.2M high density 5.25in drive

One of the first priorities I had for the Greaseweazle was backing up some of the quickly deteriorating Apple II disks in my collection. Many of them were too far gone to bring back, but I’m hopeful that some of the flux images I made can be reconstructed. I also 3D printed a case for the device to give it a little

…protection and make it easier to handle. I also tried working with some 3.5in Apple Macintosh floppies, in both 800k and 1.44M varieties, but found this to be trickier than the older Apple II format. Unfortunately I also discovered some of these disks were also starting to deteriorate. Now that I’ve restored the Macintosh IIfx, I may just use it to make some disk images.

Visual Floppy Render
using HxC to visualize the data captured in a flux image

Macintosh IIfx – history & restoration

Restoring the Macintosh IIfx actually started with a desire to run A/UX on the machine. When I found out just how badly degraded my IIfx had become, I set out to preserve it… hopefully for a long time to come.

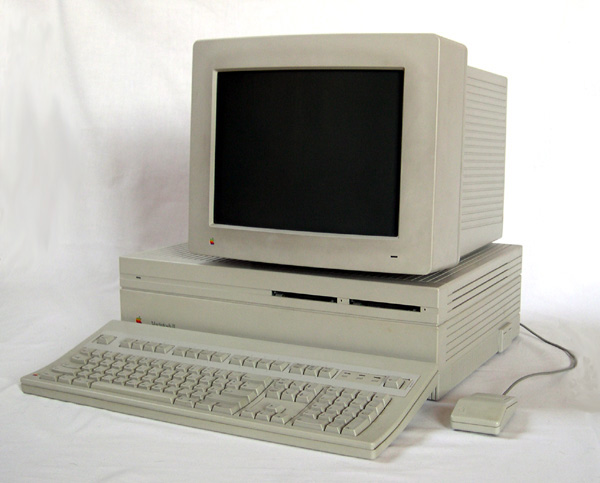
Macintosh II reference image from Wikipedia

The Macintosh II was released to the public in March of 1987. It was based on a Motorolla 68020 CPU running at 16Mhz paired with a 68881 math co-processor. This beast of a machine (by 1980’s standards) was a departure from the original monochrome Macintosh line resembling something more like the PCs and workstations of the era.

Like those machines, the Mac II was expandable with add-in cards and required both a display card and separate monitor. Apple would update the design twice, first with the Macintosh IIx which upgraded the CPU and co-processor to the 68030/68882 respectively, and lastly the Macintosh IIfx. The Macintosh IIfx was released 2 years after the IIx in 1990 and was Apple’s attempt to see just how much performance they could squeeze out of the Motorolla 68030-based Macintosh IIx platform.

The Macintosh IIfx was still based on the 68030, but ran at over twice the speed of the IIx clocking in at 40Mhz. Apple didn’t stop there though. 72-pin SIMMs weren’t quite ready in time, so Apple crafted bespoke 64-pin SIMMs that were essentially DIMMs in the shape of a 32-pin SIMM module. This gave the Mac IIfx much faster memory speeds than could be achieved with standard memory of the time, but they didn’t stop there either. The Mac IIfx supported anywhere from 4MB to 128MB of RAM, an eye-watering amount in those days. The downside was it had a price to match these specs, coming with a base price of $9k up to $12k depending on the configuration. (that’s in 1990 dollars… what would cost roughly between $22k and $29k in today’s money) That’s solidly in serious workstation territory, and the IIfx would be used as such for graphics work in the television and movie industry.

My example was given to me by a colleague who was cleaning out some of their things and asked if I wanted any of this old computer junk. It was a Macintosh II and I was happy to have it. What I didn’t know at the time was how special this machine was. While it had originally been sold as a Macintosh II, Apple reused the same case and power supply for the IIx and later IIfx. After the release of the IIfx, Apple offered the bare IIfx logic board as an upgrade path for Macintosh II and IIx customers. This Macintosh II was one of those machines that had been upgraded and came complete with 16MB of RAM installed, a pair of floppy drives and a couple of external SCSI hard disks. (something common with these machines at the time)

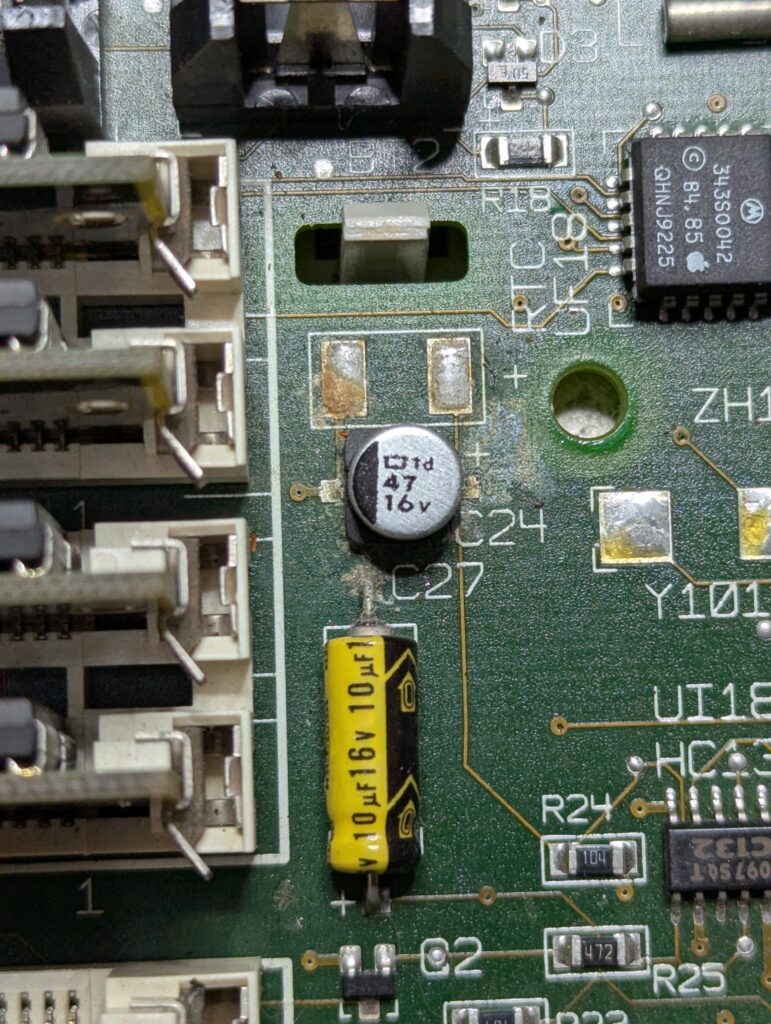
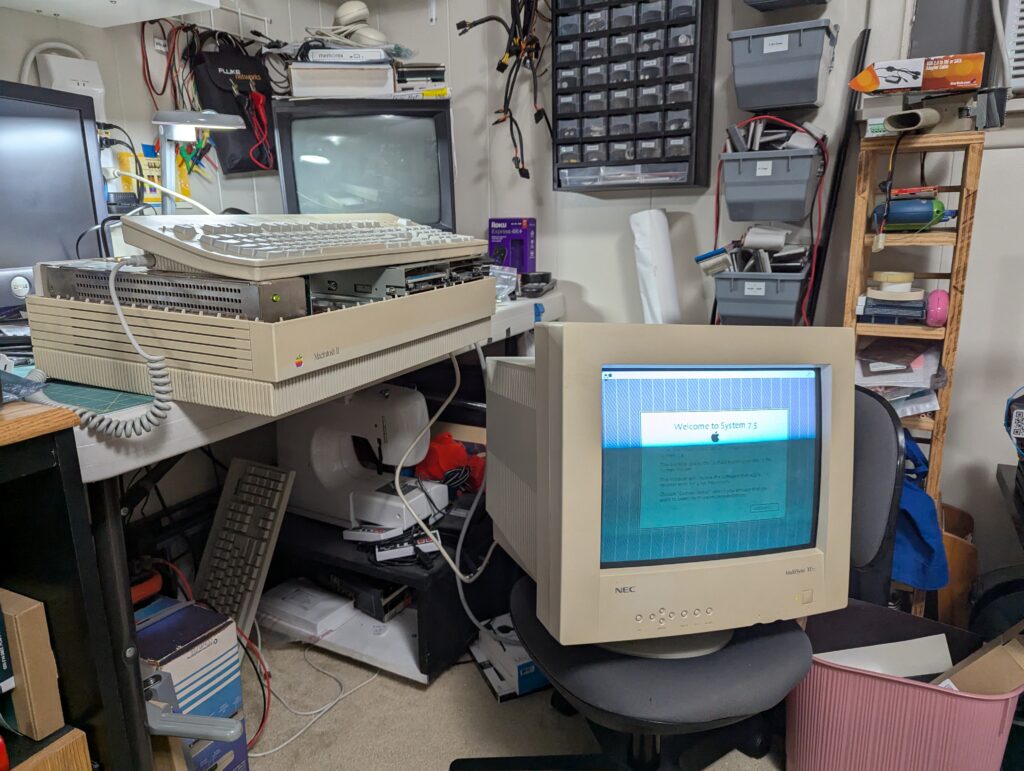
As detailed in my last post, the logic board and both floppy drives needed repair. The logic board wouldn’t even power up initially, but that was easily resolved by replacing 2 failed SMD capacitors and a little board cleaning. With that out of the way, I attempted to boot from a MacOS 7.5.0 install disk. This worked, but I noticed that not only did the auto-eject feature of the Superdrive (Apple’s name for the 1.44MB floppy) no longer function, but the drive mechanism wasn’t working entirely as it should either.

leaky 47uF 16v cap caused some minor corrosion

A later boot on the disk utility floppy revealed the older 800k floppy drive wasn’t working at all. Adrian Black covered the entire process of repairing the 800k drives in this video, so I won’t go through all the details. However, the 2 main problems are accumulated dust/lack of lubrication and a separate issue with degrading plastic gears in the eject motor assembly.

booting up after initial remediation of the logic board

Another issue that can be seen here appears to be a problem with the graphics card. There are white vertical lines at specific intervals that may indicate a fault. So far this old NEC Multisync display is the only VGA monitor I have that will work with the older macs. I’ve ordered a display output adapter that may help, but I’m not confident that it will resolve the issue.

I’ve ordered some replacement parts and have begun the process of disassembling some of the other Macs in my collection as well. All of the floppy drives, even into the PowerPC era are breaking down, likely due to the same issues. Hopefully I’ll be able to get the IIfx back up and in good working condition. To be continued…