
Restoring the Macintosh IIfx actually started with a desire to run A/UX on the machine. When I found out just how badly degraded my IIfx had become, I set out to preserve it… hopefully for a long time to come.
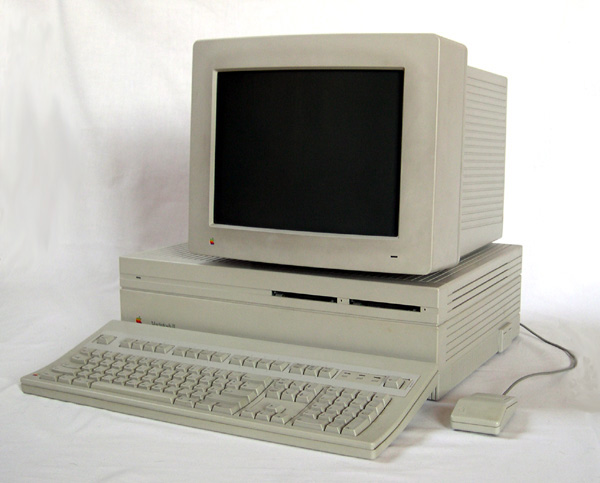
The Macintosh II was released to the public in March of 1987. It was based on a Motorolla 68020 CPU running at 16Mhz paired with a 68881 math co-processor. This beast of a machine (by 1980’s standards) was a departure from the original monochrome Macintosh line resembling something more like the PCs and workstations of the era.
Like those machines, the Mac II was expandable with add-in cards and required both a display card and separate monitor. Apple would update the design twice, first with the Macintosh IIx which upgraded the CPU and co-processor to the 68030/68882 respectively, and lastly the Macintosh IIfx. The Macintosh IIfx was released 2 years after the IIx in 1990 and was Apple’s attempt to see just how much performance they could squeeze out of the Motorolla 68030-based Macintosh IIx platform.
The Macintosh IIfx was still based on the 68030, but ran at over twice the speed of the IIx clocking in at 40Mhz. Apple didn’t stop there though. 72-pin SIMMs weren’t quite ready in time, so Apple crafted bespoke 64-pin SIMMs that were essentially DIMMs in the shape of a 32-pin SIMM module. This gave the Mac IIfx much faster memory speeds than could be achieved with standard memory of the time, but they didn’t stop there either. The Mac IIfx supported anywhere from 4MB to 128MB of RAM, an eye-watering amount in those days. The downside was it had a price to match these specs, coming with a base price of $9k up to $12k depending on the configuration. (that’s in 1990 dollars… what would cost roughly between $22k and $29k in today’s money) That’s solidly in serious workstation territory, and the IIfx would be used as such for graphics work in the television and movie industry.
My example was given to me by a colleague who was cleaning out some of their things and asked if I wanted any of this old computer junk. It was a Macintosh II and I was happy to have it. What I didn’t know at the time was how special this machine was. While it had originally been sold as a Macintosh II, Apple reused the same case and power supply for the IIx and later IIfx. After the release of the IIfx, Apple offered the bare IIfx logic board as an upgrade path for Macintosh II and IIx customers. This Macintosh II was one of those machines that had been upgraded and came complete with 16MB of RAM installed, a pair of floppy drives and a couple of external SCSI hard disks. (something common with these machines at the time)
As detailed in my last post, the logic board and both floppy drives needed repair. The logic board wouldn’t even power up initially, but that was easily resolved by replacing 2 failed SMD capacitors and a little board cleaning. With that out of the way, I attempted to boot from a MacOS 7.5.0 install disk. This worked, but I noticed that not only did the auto-eject feature of the Superdrive (Apple’s name for the 1.44MB floppy) no longer function, but the drive mechanism wasn’t working entirely as it should either.
A later boot on the disk utility floppy revealed the older 800k floppy drive wasn’t working at all. Adrian Black covered the entire process of repairing the 800k drives in this video, so I won’t go through all the details. However, the 2 main problems are accumulated dust/lack of lubrication and a separate issue with degrading plastic gears in the eject motor assembly.
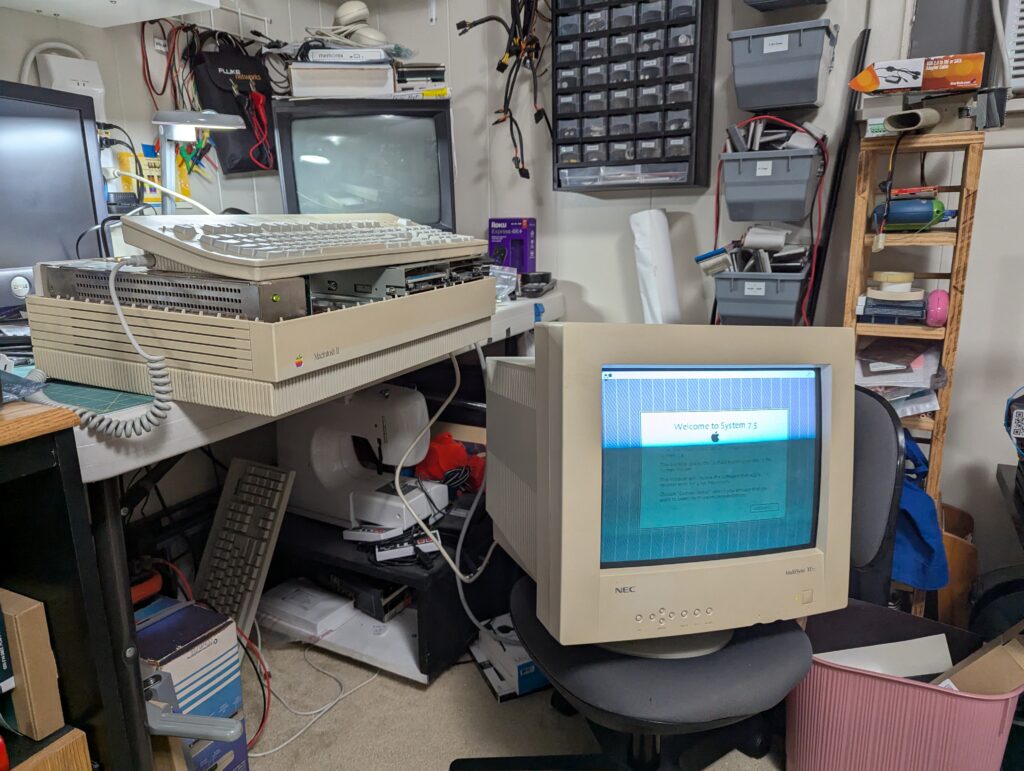
Another issue that can be seen here appears to be a problem with the graphics card. There are white vertical lines at specific intervals that may indicate a fault. So far this old NEC Multisync display is the only VGA monitor I have that will work with the older macs. I’ve ordered a display output adapter that may help, but I’m not confident that it will resolve the issue.
I’ve ordered some replacement parts and have begun the process of disassembling some of the other Macs in my collection as well. All of the floppy drives, even into the PowerPC era are breaking down, likely due to the same issues. Hopefully I’ll be able to get the IIfx back up and in good working condition. To be continued…