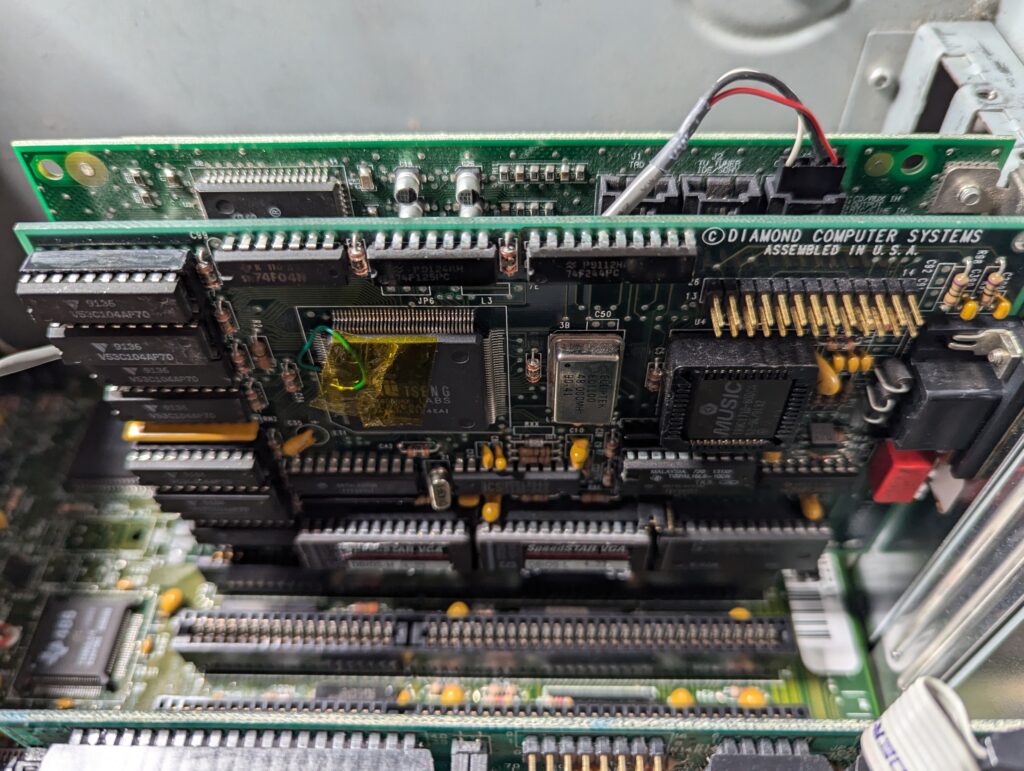
After repairing my 486SLC-33 motherboard, I’d been thinking about fully re-creating my first 486 machine (mostly) as it was when new. I still have the case and most of the original hardware, but I wanted another ISA VGA card so I wouldn’t have to give up the one I use for testing on other projects. Due to a mistake on my part while price shopping, I ended up ordering a somewhat rare and desirable one, but which was listed as scrap. Had I noticed that, I would have ordered one of the others with a slightly higher price. All I saw was that it was a Tseng ET4000AX powered Diamond Speedstar Plus and I was sold. This was one of the better ISA cards of the era and I wanted it in my restoration build.
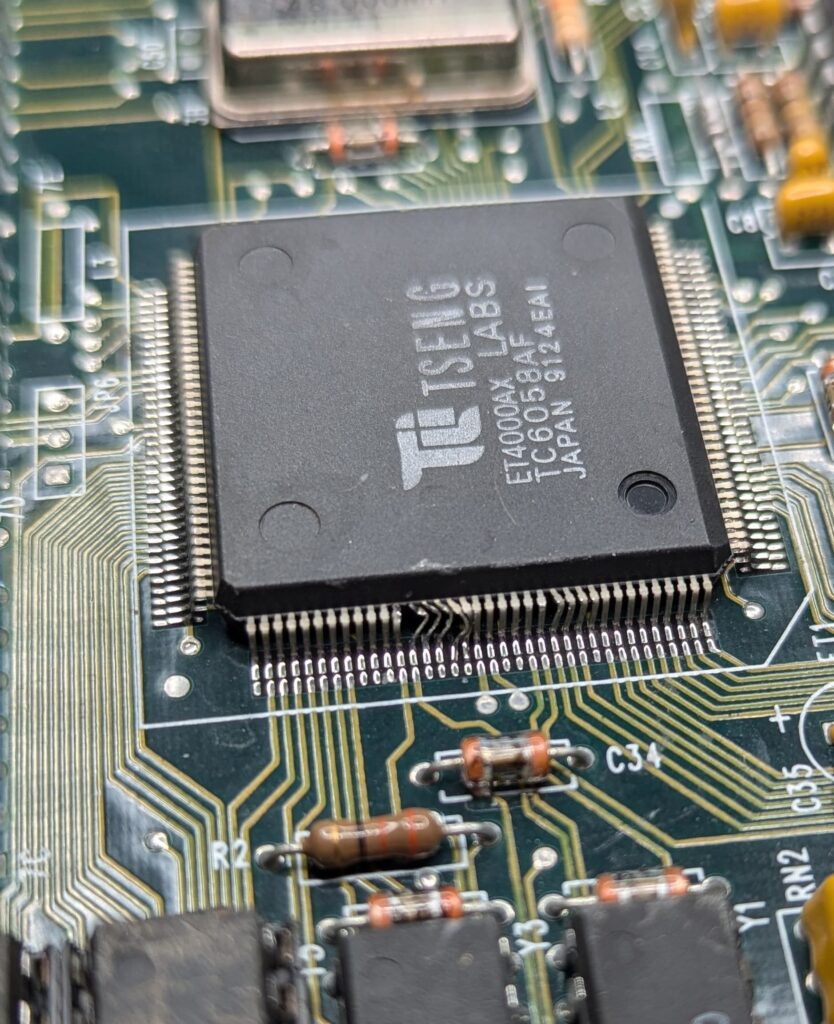
When the card arrived, I unwrapped it and it looked ok at first. Then I noticed something odd with the main chip and looked closer… something had impacted one of the rows of pins (likely the edge of another card) and crushed them in against one another. Maybe they aren’t touching I thought. I popped it into my 486 board and powered it up, but to my dismay, the card didn’t work right. After realizing my mistake, I decided I was going to try and fix the card. I got to work with some small
needles and thin-bladed tools and gently started working my way in-between the crushed pins. I was able to separate them all from each other, but ended up ripping two of them off the pads in the process. The first was an easy fix with the soldering iron… the second one, not so much. The second one to rip off the pads was badly bent and fearing that it would break if I handled it too much, I just bent it up and over the chip package.
I wondered if maybe this pin wasn’t used because it didn’t seem to connect to anything. (little did I know it actually bent backwards and linked up to a trace underneath the chip) I plugged the card in, only to find that while it did show video now, it was flashing and glitching. This was going to be more challenging than I thought.
Thankfully I’d experimented previously with bodge wires to fix broken traces that had either been damaged or corroded away. There was just enough of a trace visible at the edge of the chip that I might be able to solder something to it with a fine point tip. I exposed the copper edge of the trace and prepared a bodge wire with some solder. After a few tries I managed to connect the wire to the trace and then soldered the other end onto the pin that had been bent up and over the body of the chip. After protecting it with some Kapton tape, I plugged it into the board, and still nothing. Bummer, I thought… this thing is toast.
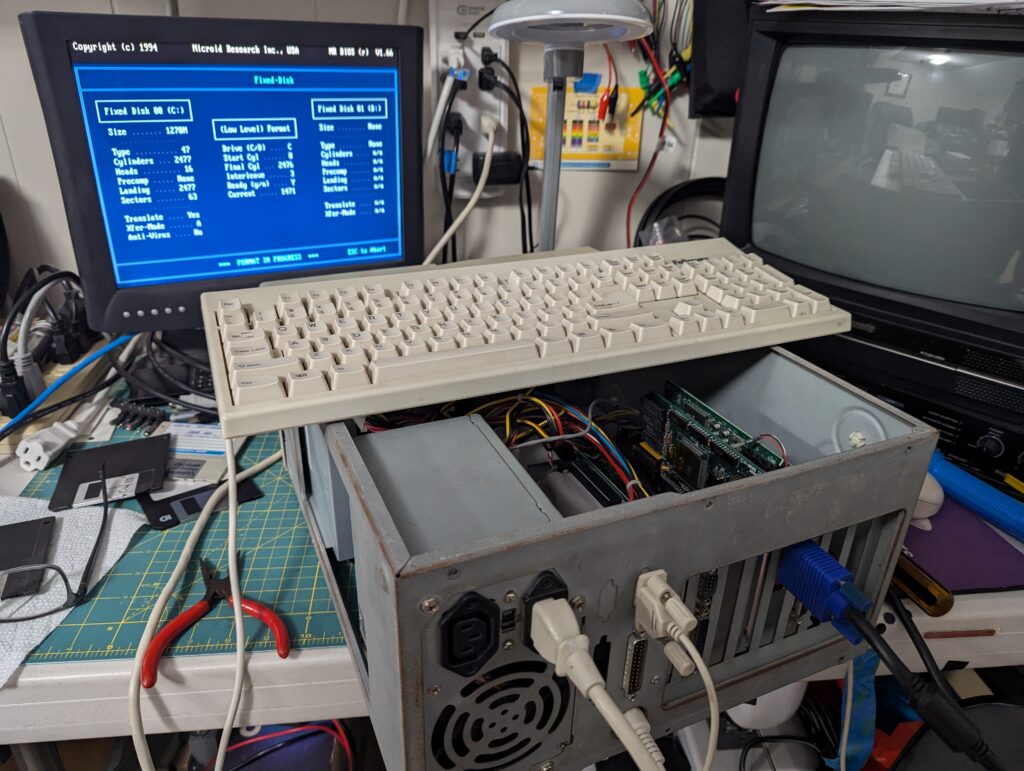
Never one to give up, I came back and looked up any information available on the card. I’d been playing with it and had noticed that it would work when I was in the BIOS, but if I tried to let it boot, it would lock up the machine. I noticed that the default setting enabled a “Turbo” mode. Maybe this was too advanced for my my machine? I flipped the appropriate DIP switches,
and what do you know… it worked like a champ! I’ve since put a few hours of run time on it and it’s been rock solid. It may not look as good as new, but it works and will do the job I intended it to.