
After some extensive repairs and restoration of my old DTK 286, I wanted to revive the motherboard of my first home computer, a Taiwanese PC XT clone: the VIP TXM-8. This board is essentially a reverse engineered copy of the IBM PC XT (5160), but with additional ROM sockets like the earlier IBM PC (5150). Thankfully the original PC and PC-XT did not have an onboard clock requiring a battery, (and thus no board damaging leakage!) but were instead configured entirely with DIP switches. Any additional/advanced features often required an expansion ROM to add that functionality.
The TXM-8 came with only a single 8k BIOS ROM leaving the other 5 sockets unpopulated. While watching one of Adrian Black’s videos about a similar board, I noticed he had populated most of the rest of his ROM sockets which allowed him to have ROM basic as startup option. I’d never seen this in my childhood as most of the IBMs (including the clone I built from spare parts) were business machines and had no use for basic. This led me to search for the source of these ROMs which you can find on github and are part of a distribution that includes a more or less universal PC XT BIOS.
I ordered up some old 8k and 16k EPROMs, of which I used only the 8k for this project. I removed the old labels and dropped a handful of the chips into my UV eraser and then built the binaries for the Super PC/Turbo XT BIOS and the accompanying basic ROM images while I waited. (if you haven’t worked with EPROMs before, they take some time to be completely wiped by the UV light)
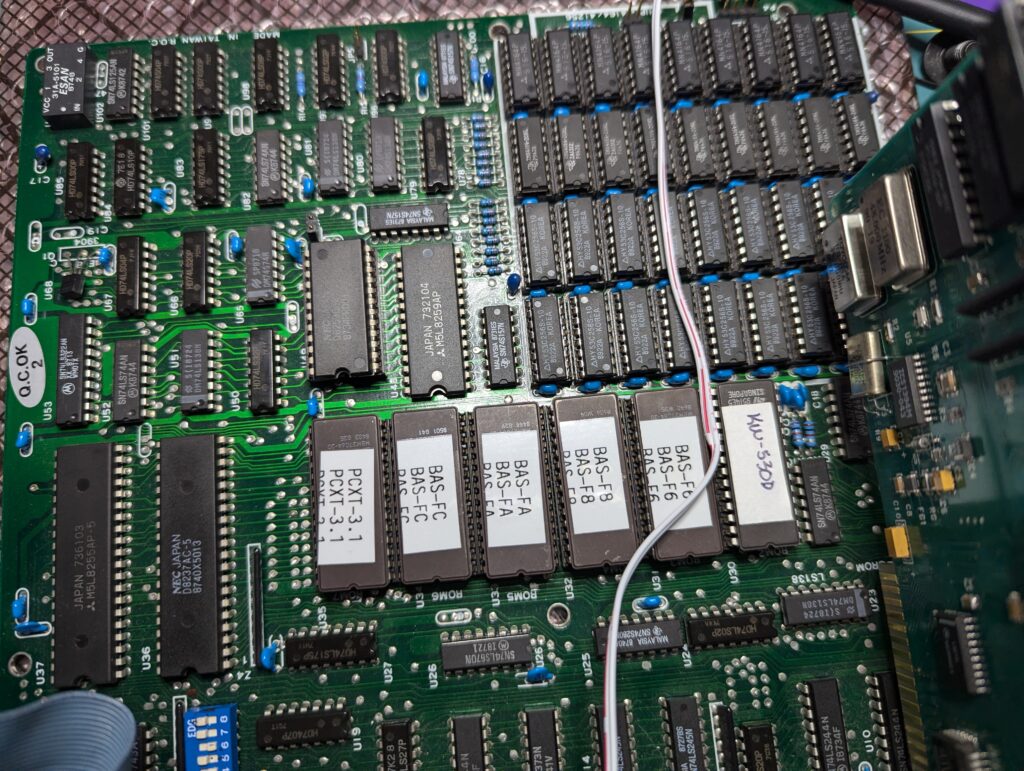
I burned all of the images, labeled the chips and amazingly it worked perfectly. (well, once I referenced Adrian’s video to figure out the correct order in which to install them anyway! close-up shot at 1:31 in the video) So now I had a PC XT with a full 640k of RAM that booted directly into ROM basic. Cool, but utterly ridiculous.
I’d also been working in parallel on a separate issue with a DiY floppy controller I’d built and wanted to have the option of either booting into ROM basic, or into DOS with the new BIOS. Unfortunately, I ran into a problem. While the PC XT could now talk to the repaired controller card, the XT only ever supported low density 360k 5.25″ floppy disks. The DiY controller card has an open source BIOS extension that provides support for other types of disks, but I couldn’t get it to work with the universal BIOS I’d installed. I tested the controller at various memory addresses and even removed the 4 ROM basic chips in case there wasn’t enough space, but that didn’t solve the issue. I could only ever get the BIOS extension to work with the OEM Phoenix BIOS chip that came with the board.
I searched around and eventually found a forum post on Vogons that linked to a ROM image from an old generic controller card that supported high density drives. This turned out to be the solution as not only did it support high density floppies, it was an 8k image I could install in the last remaining socket on the board. I configured the DiY controller to disable the onboard BIOS extension ROM, burned this new image to another 8k EPROM and installed it in the board. To my amazement, not only did it work, but it automatically detected the drive type that was connected. (this is pretty great because it means I can use EPROMs since I don’t need to store the configuration anywhere)
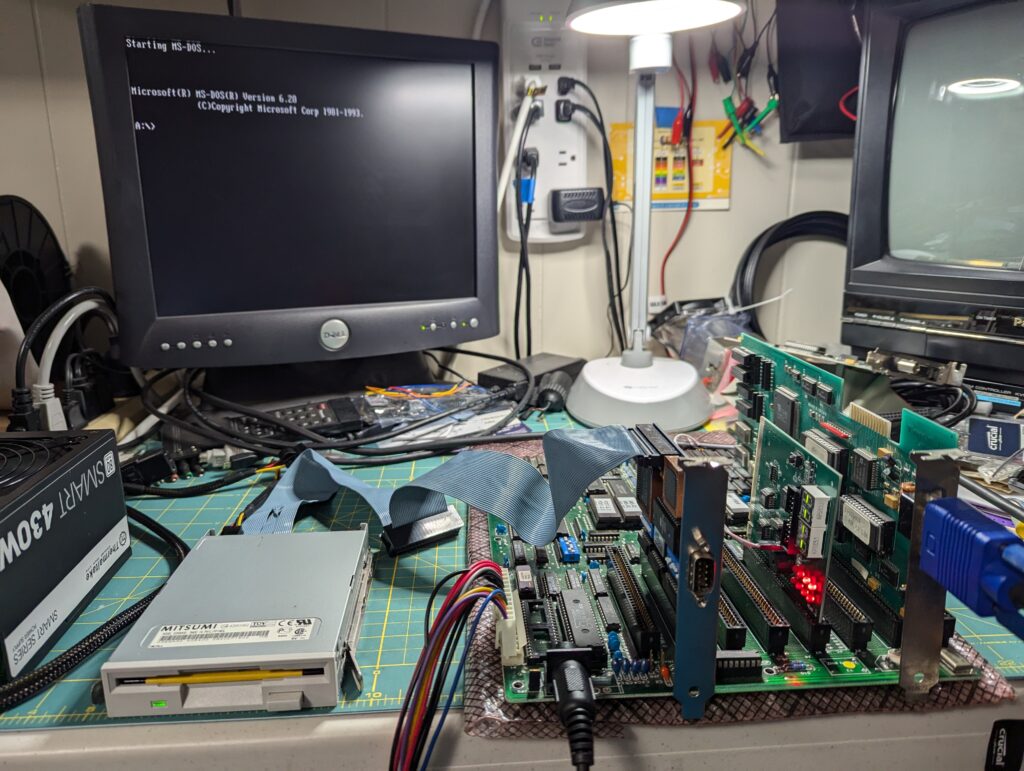
I like this new configuration for several reasons. 1) This is something that would have been entirely possible in that time period (albeit with pirated ROMs at that time) with a generic floppy controller capable of working with HD media. 2) Having the ability to boot from floppy or ROM basic gives me more interesting options to play with and potentially use in testing. 3) The more advanced BIOS is also more useful and capable than the old Phoenix code and should help with testing.